How to play video in Avalonia UI using LibVLCSharp (Windows) and ExoPlayer (Android)
Published:
Modified:
- 1 Introduction
- 2 Source Code
- 3 The Goal
-
4
Step by Step Walk-through
- 4.1 Step 1 – Create the project
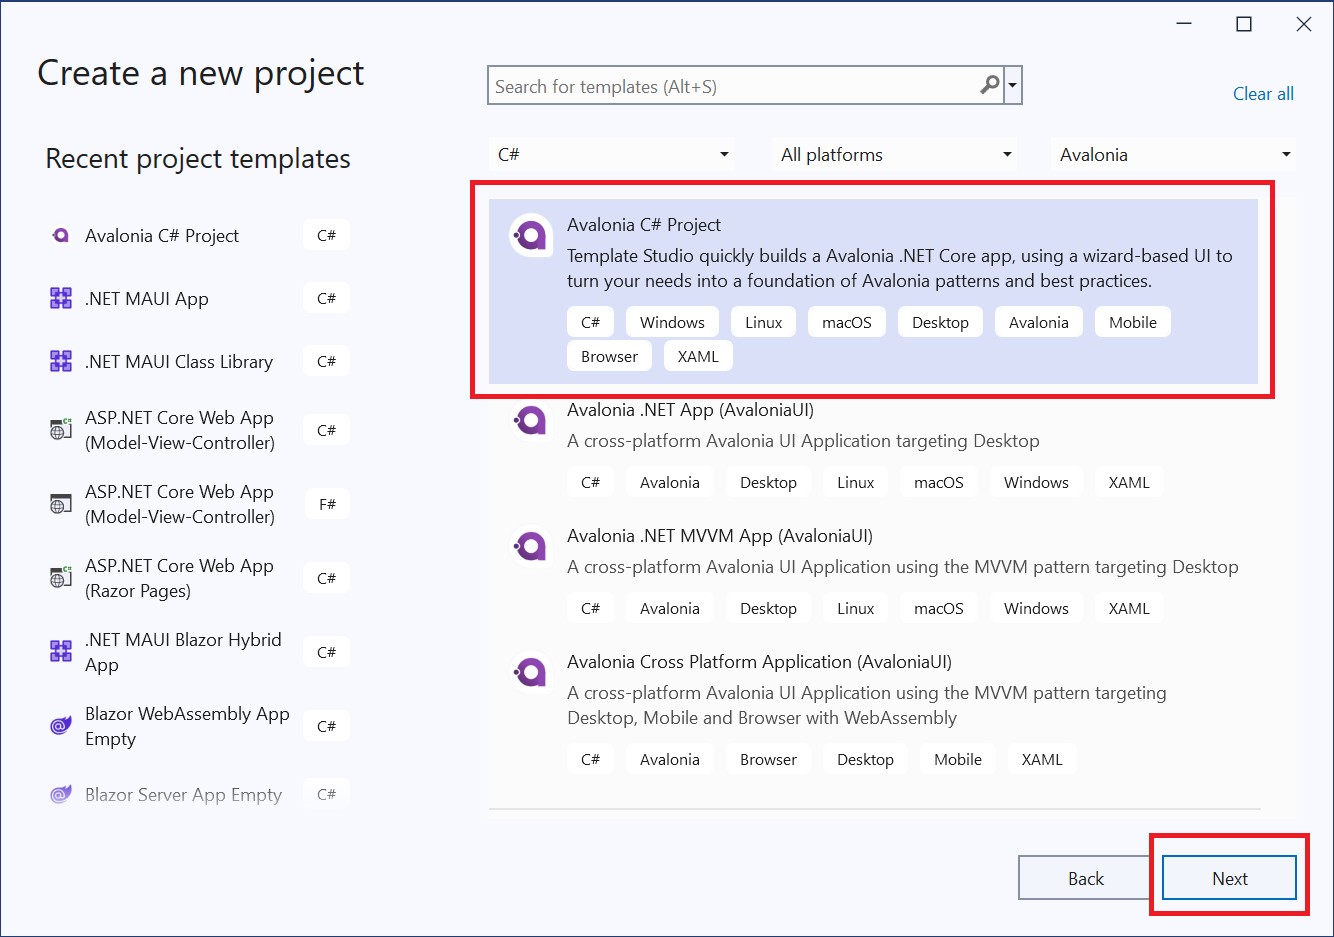
- 4.2 Step 2 – Select project type
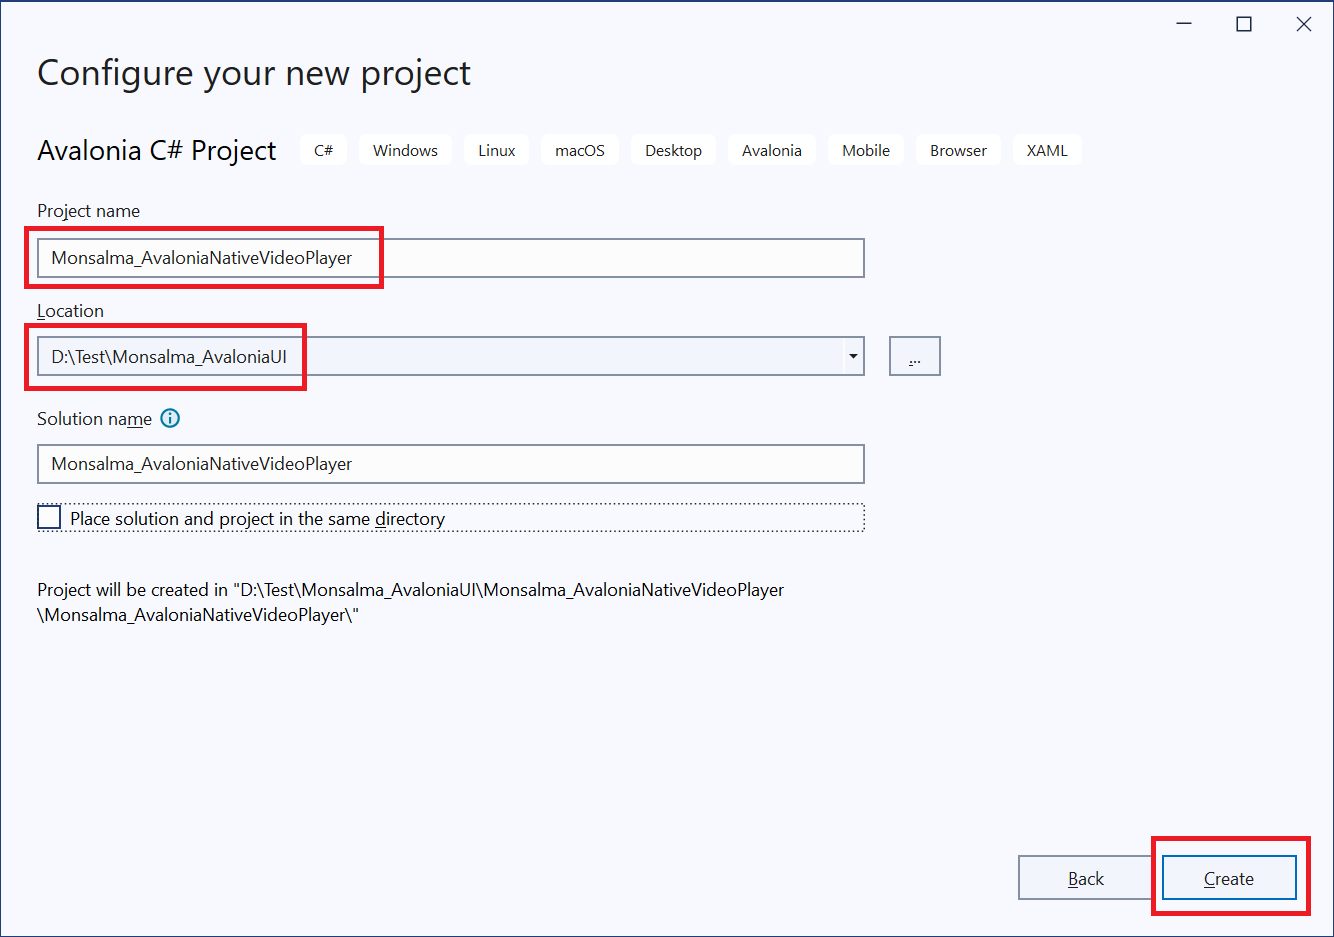
- 4.3 Step 3 – Configure the project (project name and location)
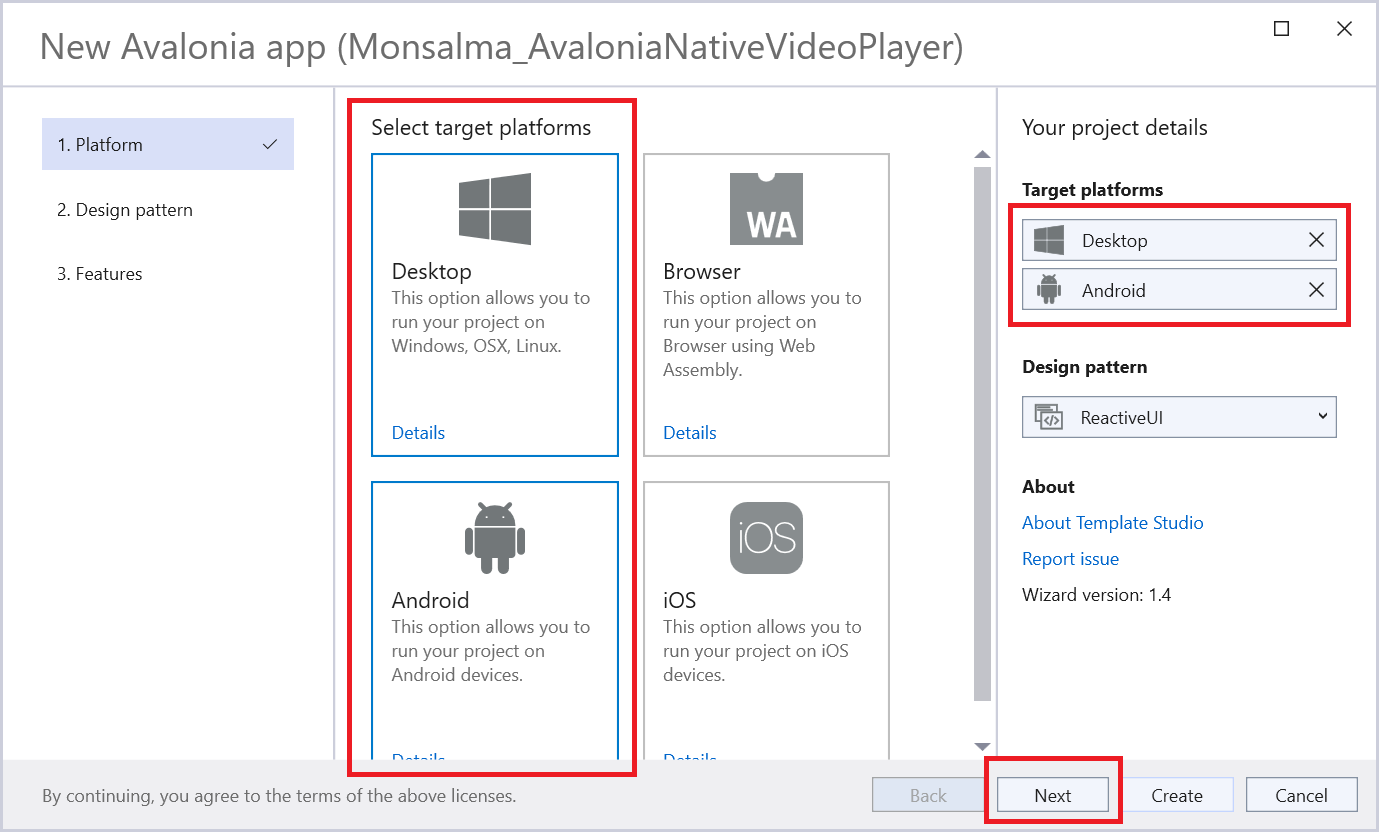
- 4.4 Step 4 – Avalonia project configuration 1/3 – Target platforms
- 4.5 Step 5 – Avalonia project configuration 2/3 – Design pattern
- 4.6 Step 6 – Avalonia project configuration 3/3 – Features
- 4.7 Step 7 – Modify C# nullable context
- 4.8 Step 8 – Modify the default Avalonia UI greeting
- 4.9 Step 9 – Run the app
- 4.10 Step 10 – Install LibVLCSharp package
- 4.11 Step 11 – Install LibVLCSharp.Avalonia package
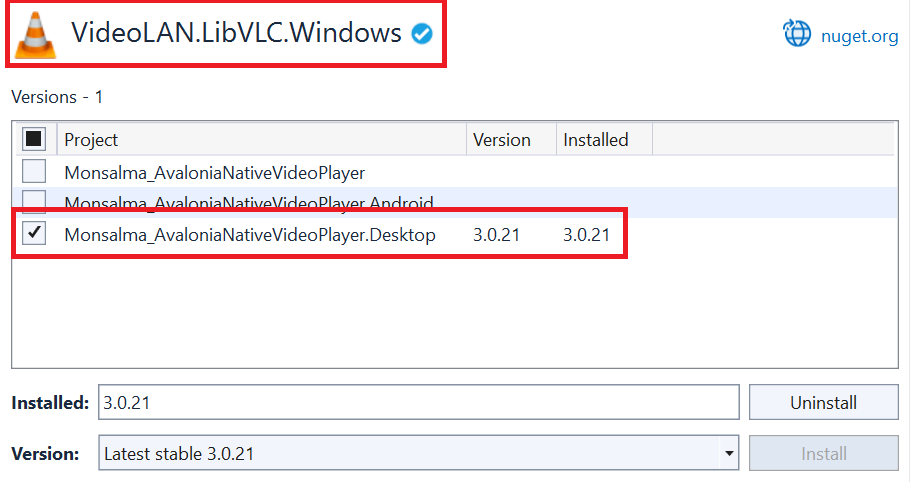
- 4.12 Step 12 – Install VideoLAN.LibVLC.Windows package
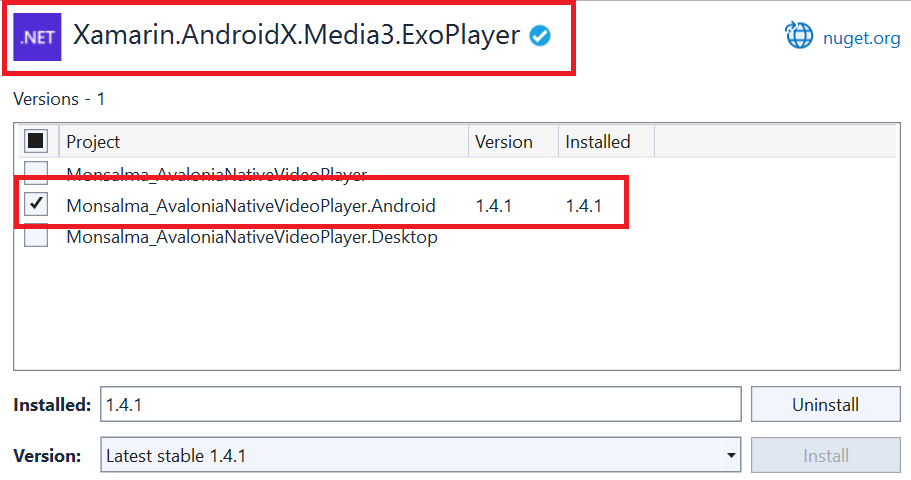
- 4.13 Step 13 – Install Xamarin.AndroidX.Media3.ExoPlayer package
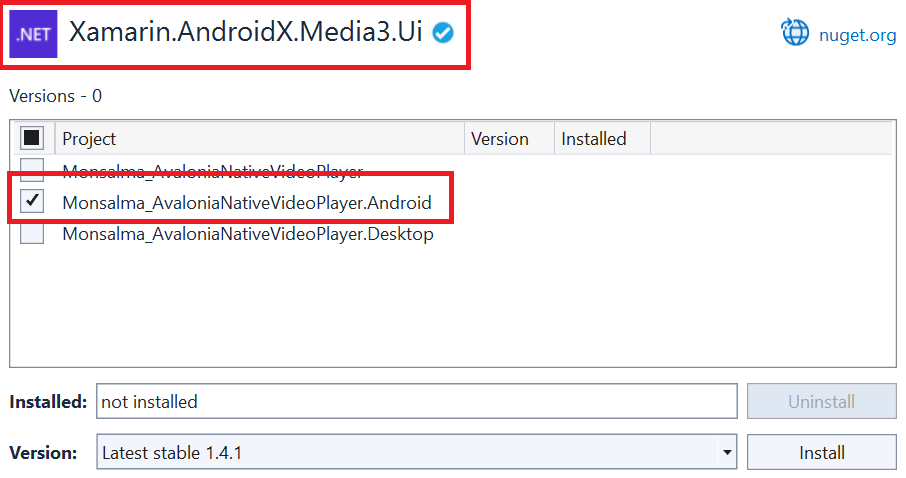
- 4.14 Step 14 – Install Xamarin.AndroidX.Media3.Ui
- 4.15 Step 15 – The source code – Native media player service
- 4.16 Step 16 – The source code – VLC player service (Windows Desktop)
- 4.17 Step 17 – The source code – Exo player service (Android)
- 4.18 Step 18 – The source code – Main project
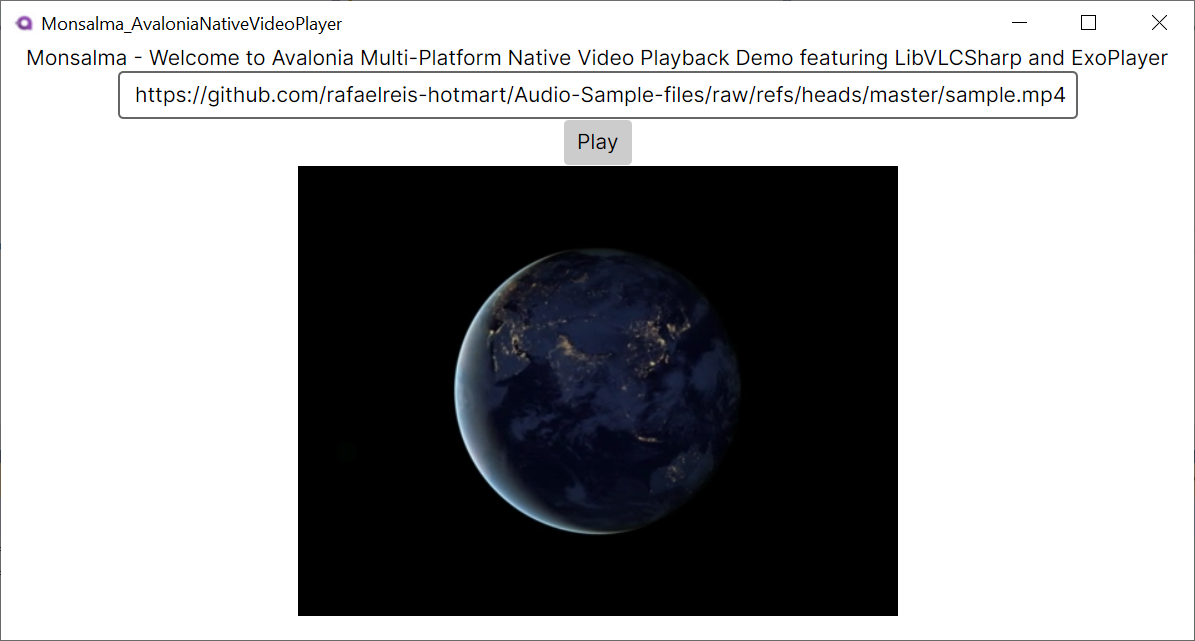
- 4.19 Step 19 – Run the app on Windows
- 4.20 Step 20 – Run the app on Android
- 5 Conclusion
Introduction
We’ll create an Avalonia UI C# project and play URI based audio/video media content. We’ll use LibVLCSharp on Windows, and ExoPlayer on Android.
This demo is a follow-up on my previous post (Using Avalonia UI framework and LibVLCSharp library to play URI based audio), in which I used LibVLCSharp to play audio on Windows and Android.
Initially, my idea was to use LibVLCSharp to play both audio and video, on both Windows and Android, but it turned out this is not possible, because LibVLCSharp VideoView control doesn’t work on Android. I needed a different solution and this is where Avalonia UI support for native views/controls jumped in.
Source Code
The complete source code is available in my GitHub repository.
The Goal
This demo is about:
- Using Visual Studio 2022 to create Avalonia C# project. The project will target Windows and Android and will use the Community Toolkit design pattern.
- Installing LibVLCSharp NuGet package (main library), LibVLCSharp.Avalonia (Avalonia related library which contains the UI control) and Windows platform related NuGet package – VideoLAN.LibVLC.Windows
- Installing ExoPlayer NuGet packages for Android – Xamarin.AndroidX.Media3.ExoPlayer and Xamarin.AndroidX.Media3.Ui
- Writing the minimal code to play an URI based audio or video content
This demo is NOT about:
- Model-View-ViewModel (MVVM) design. The demo intentionally uses code behind to perform all the work. It almost completely avoids the view model.
- User interface (UI) design. We will use minimal XAML code to play audio (TextBox for entering URI, Button to start the playback and native video control to display the video content). We will not have the pause button, stop button, jump backward/forward button or similar.
- Exception handling
- Disposing objects
- Asynchronous method invocation
- Advanced LibVLCSharp features
- Advanced ExoPlayer features
Step by Step Walk-through
I imagined this to be a beginner tutorial, so I’ll lead you through it step by step.
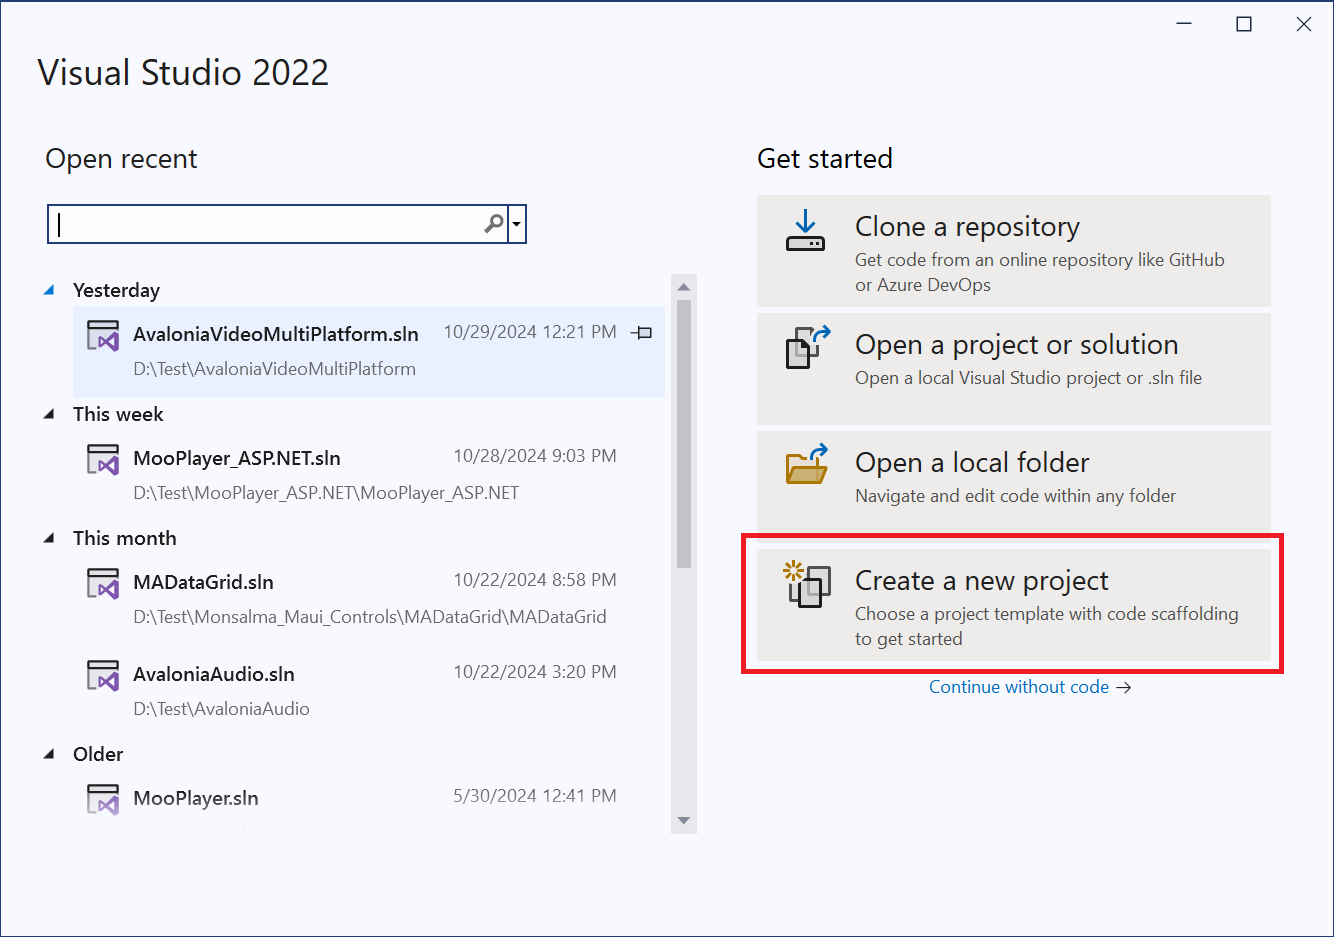
Step 1 – Create the project
Launch Visual Studio 2022 and hit the “Create a new project” button:
Step 2 – Select project type
Let’s select “Avalonia C# project” and hit Next:
Step 3 – Configure the project (project name and location)
Enter the name you like, enter location or browse to the location and hit Create:
Step 4 – Avalonia project configuration 1/3 – Target platforms
Now it’s time to start configuring Avalonia UI related stuff. First we need to select target platforms. For this demo I used only Windows Desktop and Android. The nice thing is that we can use the same concept to support other platforms, such as iOS. Hit the Next button after you’re done selecting target platforms:
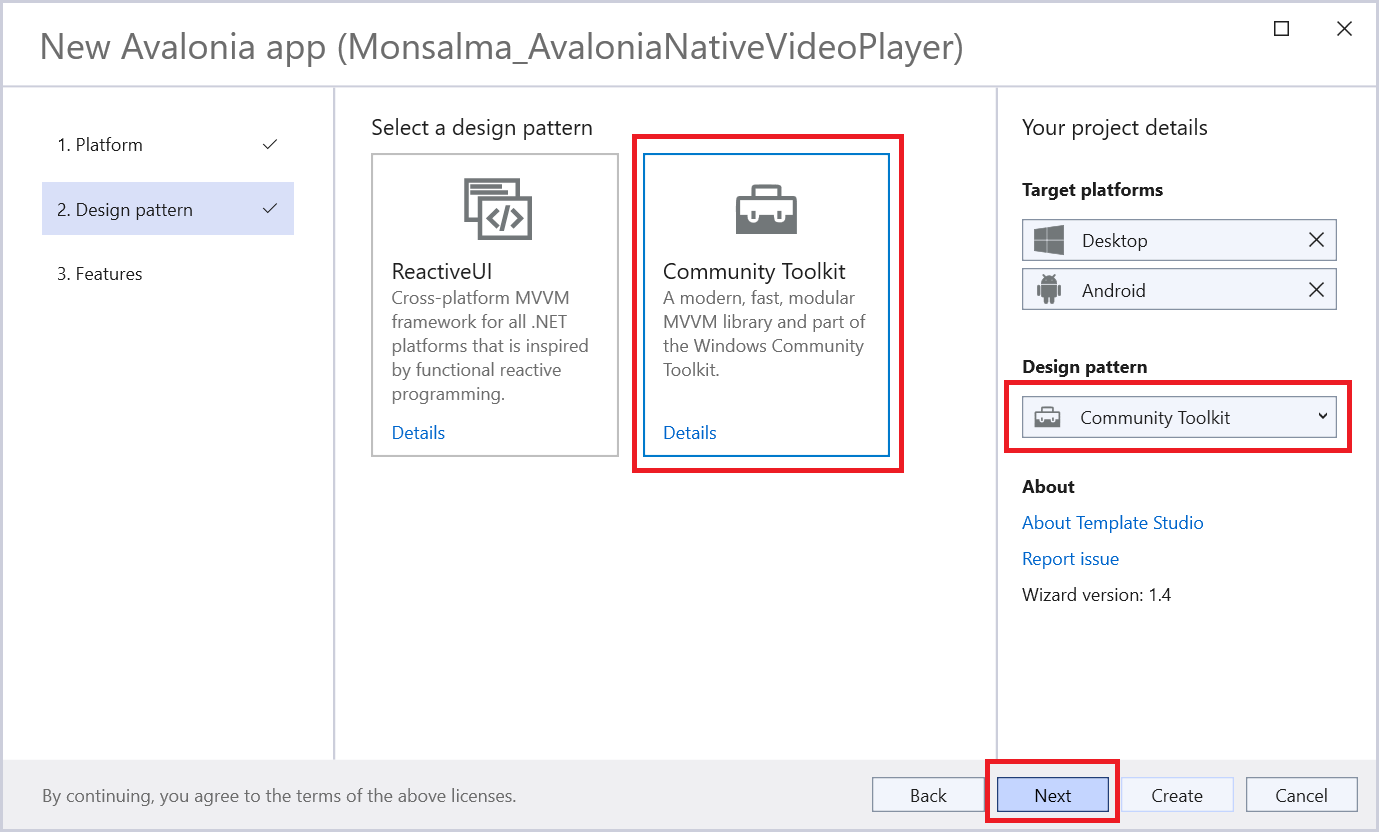
Step 5 – Avalonia project configuration 2/3 – Design pattern
As I stated earlier, this demo is not about MVVM design. I chose Community Toolkit because I’m used to it. We will not use view model so feel free to chose a pattern per your liking and hit Next:
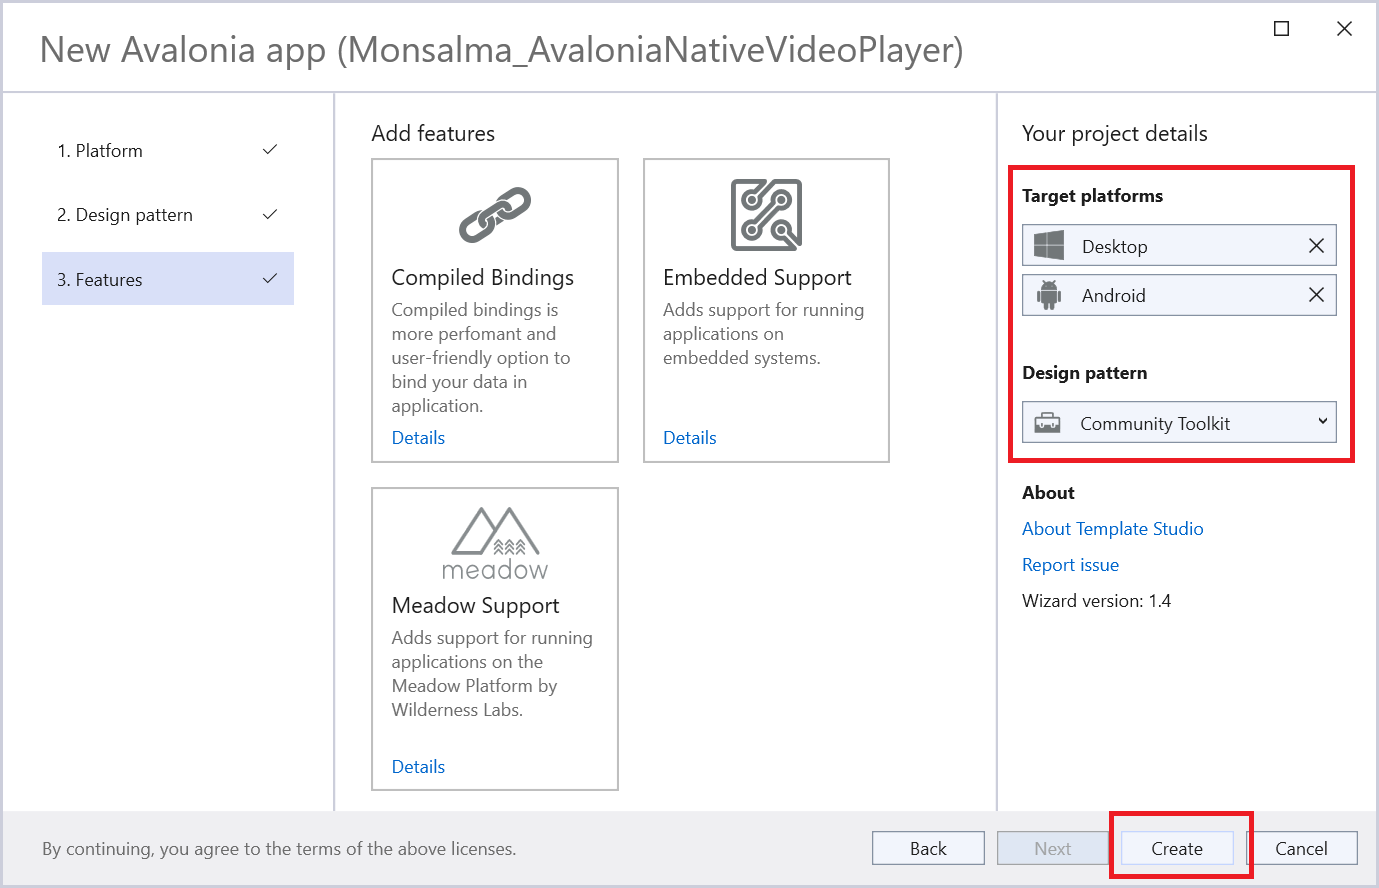
Step 6 – Avalonia project configuration 3/3 – Features
We will not be using any of these (Compiled Bindings, Embedded Support, Meadow Support). I definitely recommend using compiled bindings for non-trivial projects. For now, just hit the Create button and that will finish the project creation phase:
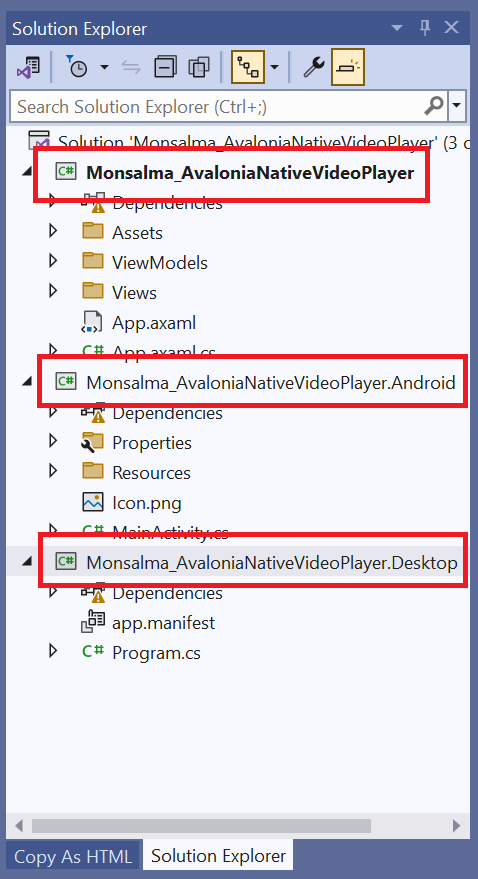
At this point, you should see 3 projects within the solution:
- Monsalma_AvaloniaNativeVideoPlayer is the main project where all of our code will go. Its output type is Class Library and it cannot be executed. It comes with Avalonia and CommunityToolkit.Mvvm NuGet packages installed.
- Monsalma_AvaloniaNativeVideoPlayer.Android is Android specific project. Not like in my previous post, in this demo we will write Android specific code, and we’ll test it in an Android simulator. Avalonia.Android NuGet package should be installed by default.
- Monsalma_AvaloniaNativeVideoPlayer.Desktop is the Windows counterpart. We will write some Windows specific code. Avalonia.Desktop NuGet package should be preinstalled.
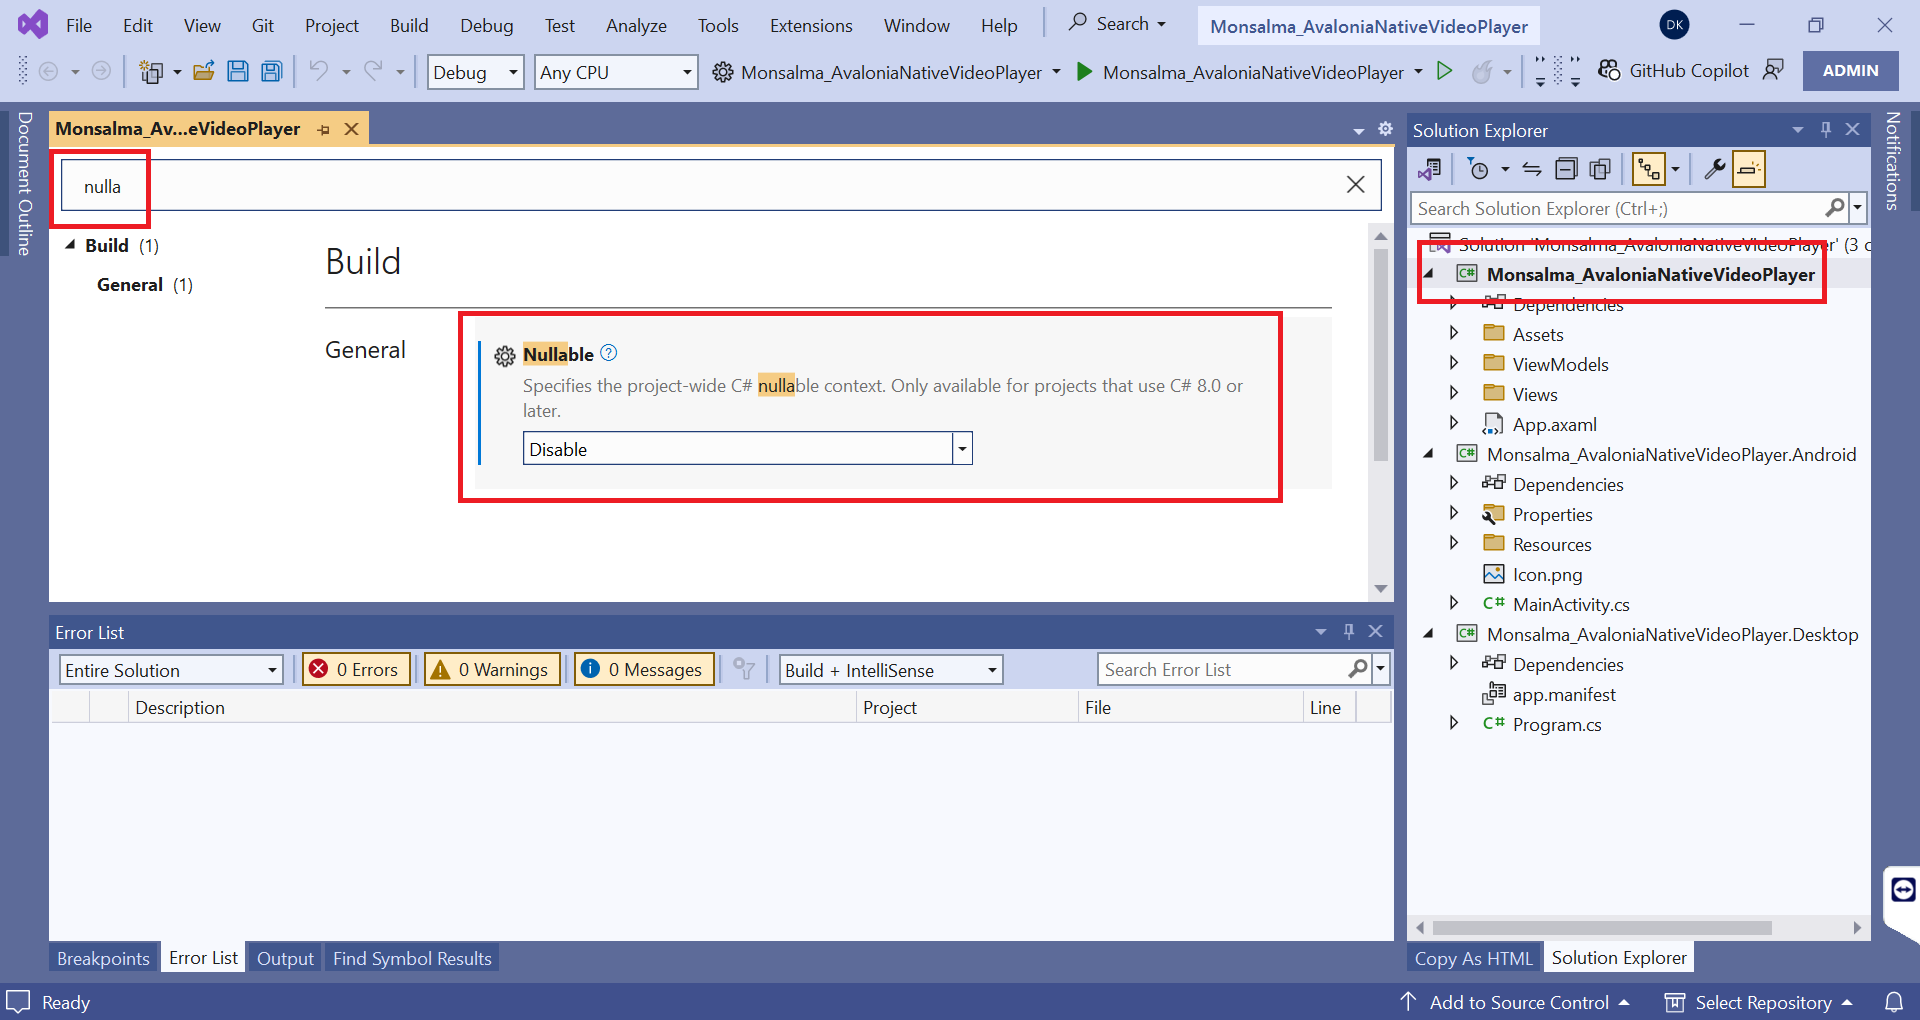
Step 7 – Modify C# nullable context
For all 3 projects, let’s set the Nullable setting to “Disable”. This is just something I like to do. We need to access project properties by right-clicking the project and selecting Properties. Then we need to locate the setting either by scrolling down or by using the search feature.
Step 8 – Modify the default Avalonia UI greeting
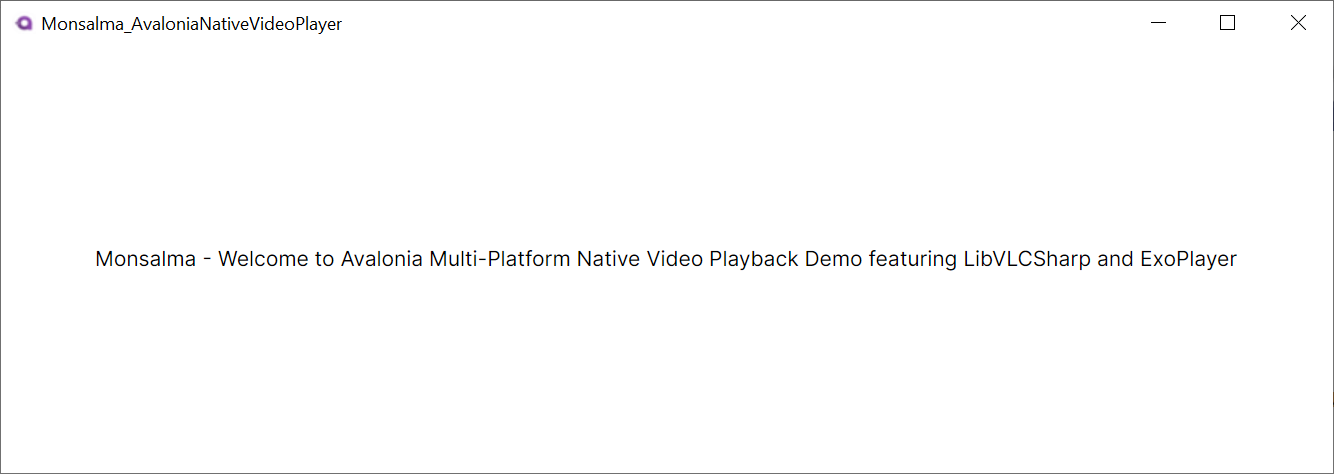
This is the most important part of the demo 🙂 Let’s locate and open MainViewModel.cs under the ViewModels folder, and modify the Greeting value to "Monsalma - Welcome to Avalonia Multi-Platform Native Video Playback Demo featuring LibVLCSharp and ExoPlayer":

Step 9 – Run the app
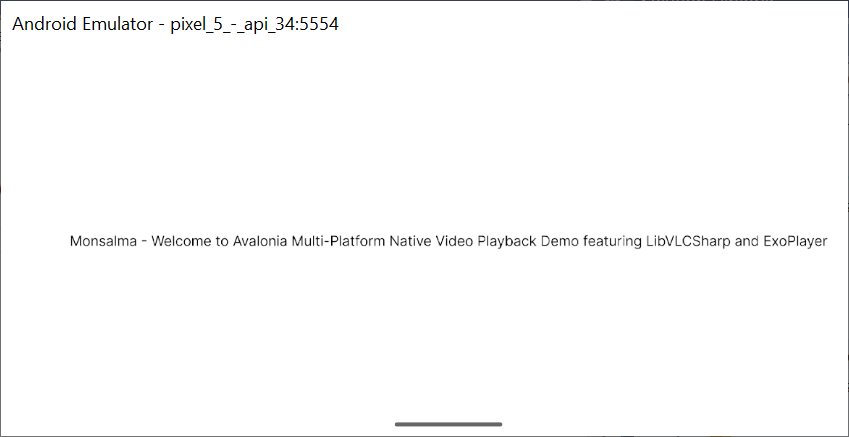
At this point we still haven’t added any audio/video related source code, but let’s try to build the solution and execute both the Windows Desktop project and Android project. When building, you should get 0 errors. The main application window should look like this:
Windows Desktop
Android Emulator (Pixel 5 – API 34)
Step 10 – Install LibVLCSharp package
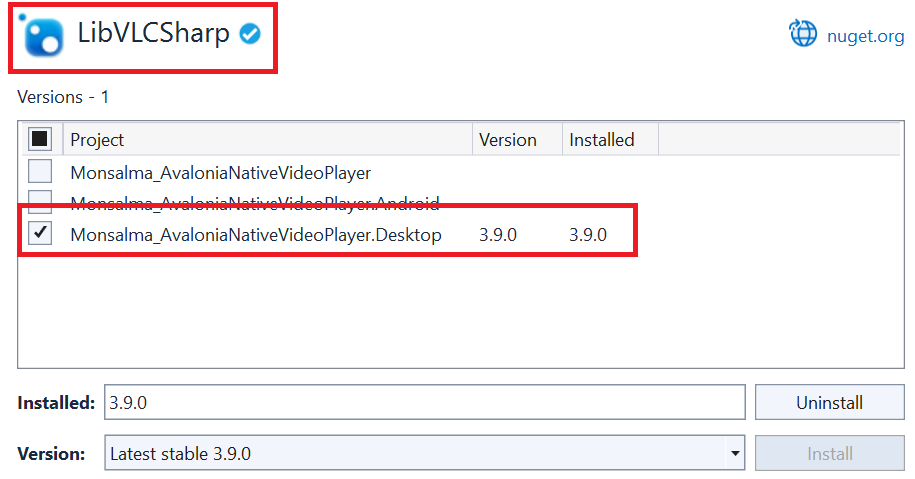
Now that we’ve verified that we can build and run our application, it’s time to install some NuGet packages. We should first install LibVLCSharp, but only in the Windows Desktop project. We don’t need the package in the common project. The idea is that the common project remains agnostic to the actual video control used in platform specific projects. After installing the package, NuGet Package Manager should show this:
Step 11 – Install LibVLCSharp.Avalonia package
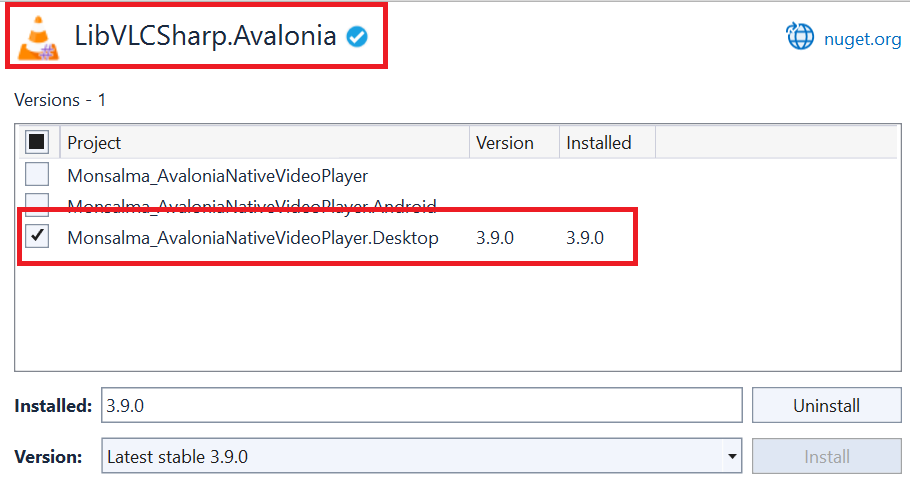
Next, we need to add LibVLCSharp.Avalonia package, and only to the Windows Desktop project:
Step 12 – Install VideoLAN.LibVLC.Windows package
Similarly, we need to add VideoLAN.LibVLC.Windows package to the Windows Desktop project:
Step 13 – Install Xamarin.AndroidX.Media3.ExoPlayer package
Xamarin.AndroidX.Media3.ExoPlayer contains the player itself. We need to add it only to the Android project:
Step 14 – Install Xamarin.AndroidX.Media3.Ui
Xamarin.AndroidX.Media3.Ui contains UI (user interface) controls. We need it only in the Android project:
Step 15 – The source code – Native media player service
We’ll create a simple service and use a static member within the App class to hold the reference to the service. This is the simplest way of using a service, but it will serve us well in this demo.
INativeMediaPlayerService.cs
public interface INativeMediaPlayerService
{
	Control CreateControl();
	void Play(string uri);
}
CreateControl method returns the media player UI control. The idea is to first create the UI control and then to add it to the visual tree.
The Windows Desktop project will return LibVLC VideoView control. VideoView is a part of LibVLCSharp.Avalonia NuGet package. VideoView class already inherits from Avalonia’s NativeControlHost class so we just need to instantiate it.
The Android project will use a different approach. We’ll need to create a class which inherits NativeControlHost class. I’ll explain this later in the article.
The Play method will simply initiate the playback.
App.axaml.cs
Here we only define the service.
public static INativeMediaPlayerService AppNativeVideoPlayerService { get; set; }Service initialization – Windows Desktop
In Program.cs, within BuildAvaloniaApp, we simply instantiate VLCPlayerService (to be discussed later):
App.AppNativeVideoPlayerService = new VLCPlayerService();Service initialization – Android
Similarly, we add Exo player service related code to MainActivity.cs, within the CustomizeAppBuilder method:
App.AppNativeVideoPlayerService = new ExoPlayerService();Step 16 – The source code – VLC player service (Windows Desktop)
VLCPlayerService.cs
public class VLCPlayerService : INativeMediaPlayerService
{
    private LibVLC MainLibVLC { get; set; }
    private MediaPlayer MainMediaPlayer { get; set; }

    public Control CreateControl()
    {
        // Create player
        MainLibVLC = new LibVLC(enableDebugLogs: true);

        // Create player view
        MainMediaPlayer = new(MainLibVLC);

        // Create player control
        VideoView videoView = new()
        {
            MediaPlayer = MainMediaPlayer
        };

        return videoView;
    }

    public void Play(string uri)
    {
        // Create media
        var media = new Media(MainLibVLC, new Uri(uri));

        // Play media
        MainMediaPlayer.Media = media;
        MainMediaPlayer.Play();
    }
}
As I said earlier, here most of the work has already been done for us. We have a UI control (VideoView) we can use.
CreateControl method instantiates LibVLC engine (LibVLC) and VLC media player (MediaPlayer). Then it creates a VideoView control and sets its media player property.
Play method creates a Media object based on the provided URI, assigns the media to the media player and initiates the playback.
Please note the simplicity of this – we only needed to create a VideoView object and assign a media player to it. LibVLCSharp took care of all the rest.
Step 17 – The source code – Exo player service (Android)
For the Android portion of the demo, we’ll need to dig a bit deeper. We’ll implement a service, which will be pretty similar to its Windows counterpart, but we’ll need to implement a user interface control as well.
ExoPlayerControl.cs
ExoPlayerControl inherits from NativeControlHost. In general, we use NativeControlHost class when we want to gain access to native UI controls. Our original problem was that we could not use one library/control to play video on both Windows and Android. NativeControlHost allows us to overcome this problem by using different controls on different platforms.
We can override many NativeControlHost methods, but since this is a minimal demo, we’ll override only CreateNativeControlCore. The method should instantiate a native UI control. In our case, we need to instantiate AndroidX.Media3.UI.PlayerView.
Unfortunately, Avalonia UI documentation doesn’t provide a lot of info about this. Luckily, I found an article which I believe will be useful to anyone interested in the topic – Embedding Native (Windows and Linux) Views/Controls/Applications into Avalonia Applications in Easy Samples.
As a starting point for the code below, I used an official Avalonia article – Embed Native Views. Create a basic media player app using Media3 ExoPlayer is another article worth exploring.
Now back to the specific code. CreateNativeControlCore builds the player (IExoPlayer instance) and creates the native UI control (AndroidX.Media3.UI.PlayerView instance). Lastly, the method returns Android handle (AndroidViewControlHandle) to the native control (AndroidX.Media3.UI.PlayerView).
public class ExoPlayerControl : NativeControlHost
{
	public IExoPlayer MainExoPlayer { get; private set; }

	protected override IPlatformHandle CreateNativeControlCore(IPlatformHandle parent)
	{
		var parentContext = (parent as AndroidViewControlHandle)?.View.Context ?? global::Android.App.Application.Context;

		// Create player
		ExoPlayerBuilder exoPlayerBuilder = new(parentContext);
		MainExoPlayer = exoPlayerBuilder.Build();

		// Create player view
		AndroidX.Media3.UI.PlayerView exoPlayerView = new(parentContext)
		{
			Player = MainExoPlayer
		};

		return new AndroidViewControlHandle(exoPlayerView);
	}
}
ExoPlayerService.cs
As you can see below, CreateControl method is super simple, but there’s something important you should know. It is not needed only to instantiate an ExoPlayerControl object in order to obtain the handle to the underlying native control. It is necessary that the control gets added to the visual tree. This cannot be done in CreateControl, but somewhere in the main/common project.
To be specific, CreateNativeControlCore (ExoPlayerControl) will not be executed until the control is added to the visual tree. That’s why we have a handler for AttachedToVisualTree event. We use the handler to access the MainExoPlayer object. Doing this in CreateControl would result in having a null value.
Play method is straightforward. We create the URI media (MediaItem), add media to the player and initiate the playback.
public class ExoPlayerService : INativeMediaPlayerService
{
    private IExoPlayer MainExoPlayer { get; set; }

    public Control CreateControl()
    {
        ExoPlayerControl exoPlayerControl = new();
        exoPlayerControl.AttachedToVisualTree += ExoPlayerControl_AttachedToVisualTree;

        return exoPlayerControl;
    }

    private void ExoPlayerControl_AttachedToVisualTree(object sender, Avalonia.VisualTreeAttachmentEventArgs e)
    {
        if (sender is ExoPlayerControl exoPlayerControl)
        {
            MainExoPlayer = exoPlayerControl.MainExoPlayer;
        }
    }

    public void Play(string uri)
    {
        // Create media item
        MediaItem mediaItem = MediaItem.FromUri(uri);

        // Play media item
        MainExoPlayer.ClearMediaItems();
        MainExoPlayer.AddMediaItem(mediaItem);
        MainExoPlayer.Prepare();
        MainExoPlayer.Play();
    }
}
Step 18 – The source code – Main project
The only thing left is to use the native media player service we just built.
XAML
We have the greeting text block, media URI text box, play button and stack panel which acts as a container for native video player control.
<StackPanel
	Orientation="Vertical"
	HorizontalAlignment="Center">

	<TextBlock Text="{Binding Greeting}" HorizontalAlignment="Center" VerticalAlignment="Center"/>

	<TextBox
		x:Name="MediaURI"
		HorizontalAlignment="Center"
		Text="https://github.com/rafaelreis-hotmart/Audio-Sample-files/raw/refs/heads/master/sample.mp4" />

	<Button
		HorizontalAlignment="Center"
		Content="Play"
		Click="Button_Click" />

	<StackPanel
		x:Name="VideoContainer">

	</StackPanel>

</StackPanel>
Code behind
In InitMediaPlayer method, we call CreateControl. Based on the running platform (Windows vs. Android), we’ll get either an instance to LibVLC VideoView, or an instance to AndroidX.Media3.UI.PlayerView. We set control width and height, and add the control to the container.
public partial class MainView : UserControl
{
    public MainView()
    {
        InitializeComponent();
        InitMediaPlayer();
    }

    private void InitMediaPlayer()
    {
        Control mediaPlayerControl = App.AppNativeVideoPlayerService.CreateControl();

        mediaPlayerControl.Width = 400;
        mediaPlayerControl.Height = 300;

        VideoContainer.Children.Clear();
        VideoContainer.Children.Add(mediaPlayerControl);
    }

    private void Button_Click(object sender, Avalonia.Interactivity.RoutedEventArgs e)
    {
        App.AppNativeVideoPlayerService.Play(MediaURI.Text);
    }
}
Step 19 – Run the app on Windows
Finally it’s time to play some media!
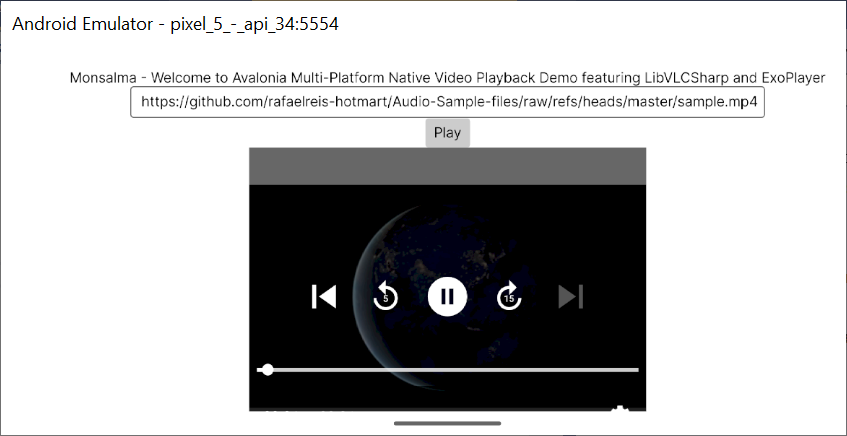
Step 20 – Run the app on Android
I used Google Pixel 5 – API 34 Android emulator:
Conclusion
We covered many topics in this post, such as:
- Creating and configuring Avalonia C# projects
- Installing LibVLCSharp NuGet packages
- Installing Android Media3 NuGet packages (ExoPlayer)
- Simplified service layer pattern
- Using LibVLCSharp
VideoViewcontrol - Creating Avalonia user control based on native Android UI control (ExoPlayer)
Please share your suggestions for making the content even more useful. I’d be glad to extend some sections to contain more details, or even write separate posts to address the more complex concepts.
To learn how to play audio in Avalonia UI, refer to the related post – How to play audio in Avalonia UI.

Leave a Reply