How to use data binding within Avalonia UI user control, i.e. How to bind to user control properties within the user control itself
Published:
Modified:
- 1 Introduction
- 2 Demo Project
- 3 Typical beginner approach (does not work)
- 4 Code Behind
- 5 XAML – Define user control
- 6 XAML – Bind to user control by name
- 7 XAML – Bind to user control using ancestor type syntax
- 8 XAML – Bind to user control by setting data context
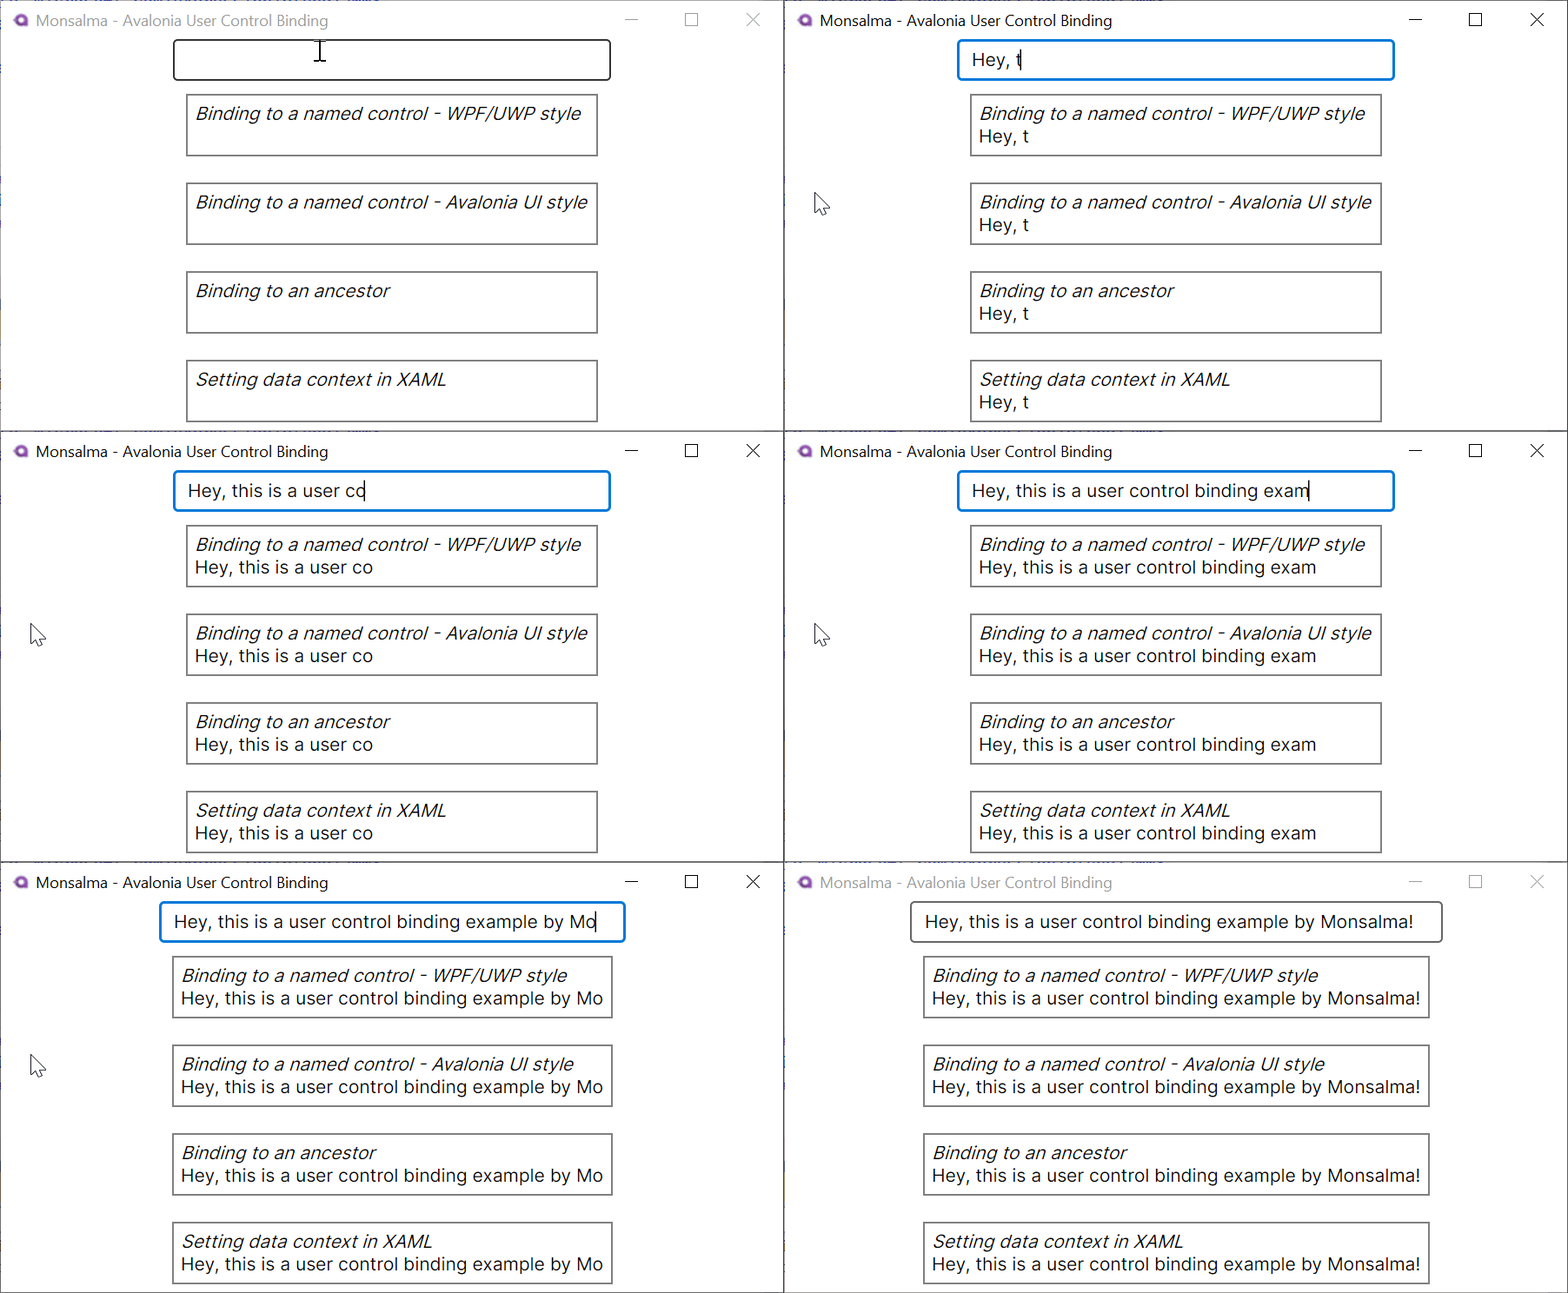
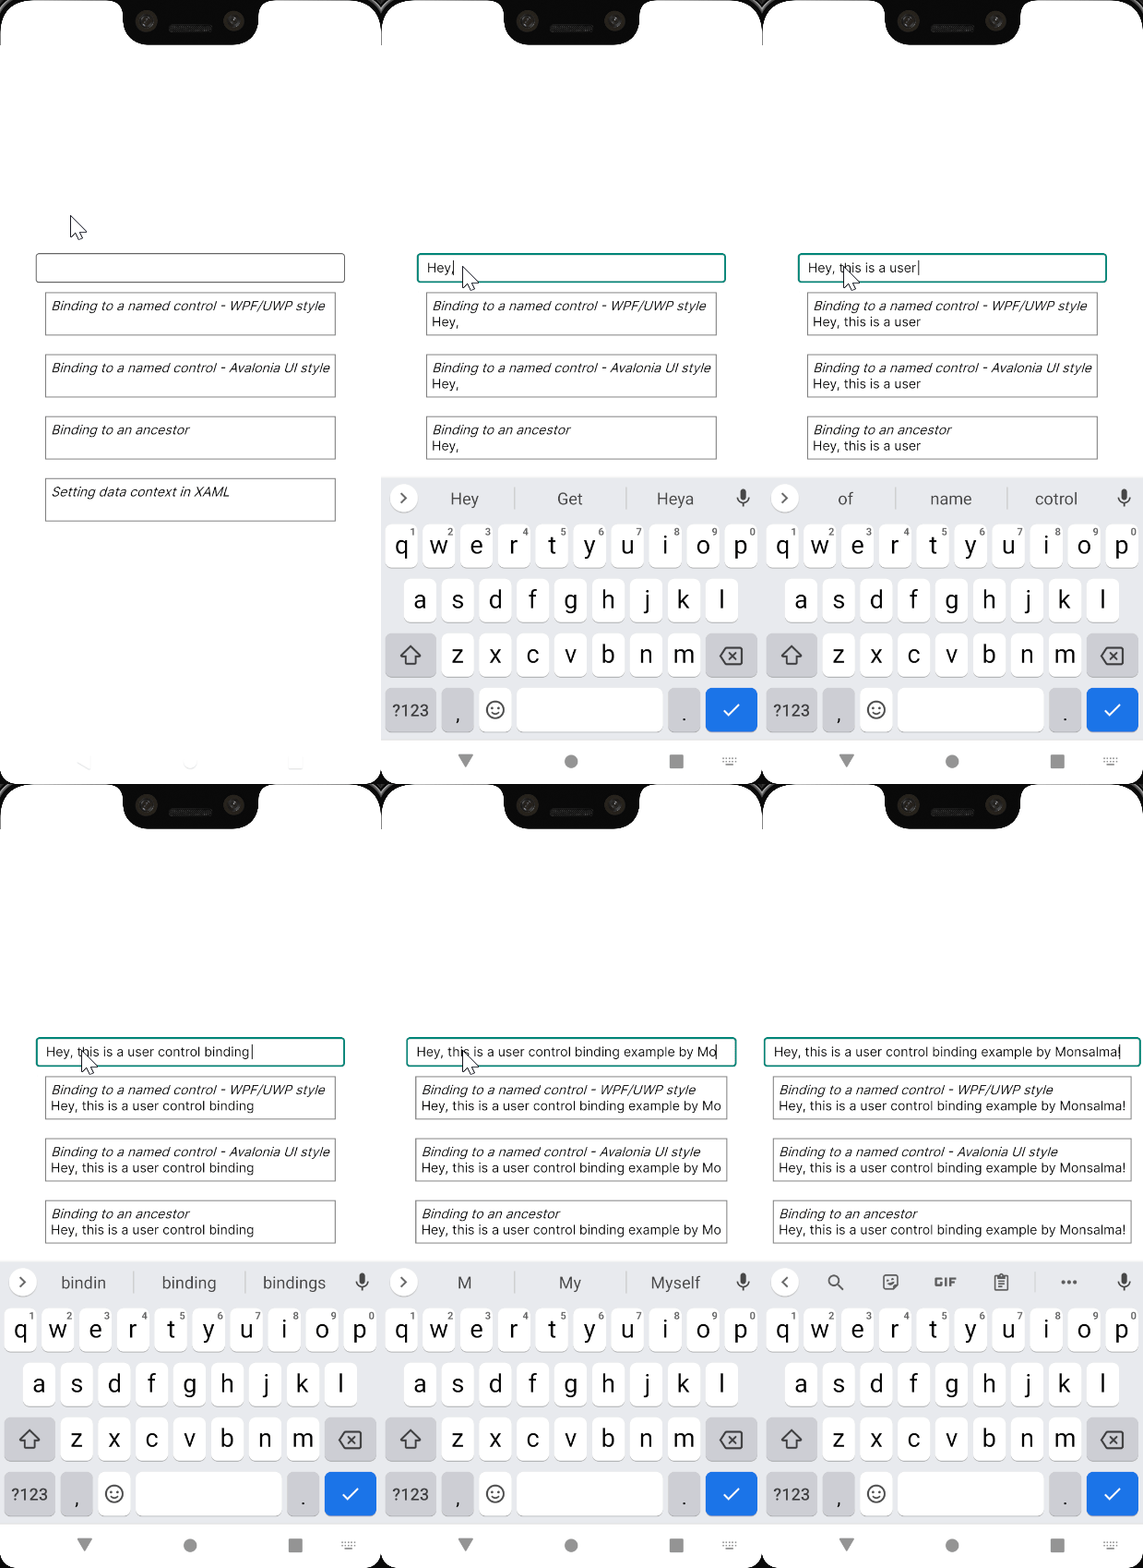
- 9 User control binding in action
- 10 Summary
Introduction
Avalonia UI has powerful data binding mechanism. Avalonia UI allows us to create custom user controls and reuse our code. So what’s the problem?! The problem is that using data binding within user controls is not straightforward to beginners. This article explains how this is done.
Demo Project
This post comes with a minimal demo project. It is super easy to understand. You can access the complete source code on GitHub (Avalonia UI user control binding).
The demo project showcases how to:
- Create a simple user control
- Define a
DirectPropertyin the user control code behind file - Access the
DirectPropertyfrom the user control XAML file - Use the user control from the main view (XAML)
You will learn to:
- Bind to a named control (WPF/UWP style and Avalonia UI style)
- Bind to an ancestor
- Set data context and use simple binding
Typical beginner approach (does not work)
When working with user controls, this is the typically scenario:
- We have our main window, main view and custom user control.
- Main window contains the main view, and the main view contains the user control.
- Main window and main view are using a view model as their data context.
- The user control automatically inherits data context from its parent (the view model).
- Naturally, within the user control, we try to bind to a direct property of the user control itself. But it doesn’t work!
- To make it work, we can either set a data context of the user control and use simple bindings (I wrote about this in a separate article), or we can use a bit more complex bindings.
Code Behind
In our simple code behind, we simply have one simple direct property:
public static readonly DirectProperty<BindableUserControl, string> GreetingProperty =
	AvaloniaProperty.RegisterDirect<BindableUserControl, string>(
		nameof(Greeting),
		o => o.Greeting,
		(o, v) => o.Greeting = v
	);

private string greeting;
public string Greeting
{
	get => greeting;
	set => SetAndRaise(GreetingProperty, ref greeting, value);
}
XAML – Define user control
There are 2 important things to mention here:
- We use the
x:DataTypeXAML attribute because we want to enable compiled bindings. Compiled bindings save your time by making it easier for the editor to make useful suggestions to you, and by catching syntax errors at the compilation/build time. Compiled bindings also improve the performance of the application by eliminating the use of reflection. - We’ll use data binding by name, so we need to define the user control name (via the
NameXAML attribute).
<UserControl xmlns="https://github.com/avaloniaui"
             xmlns:x="http://schemas.microsoft.com/winfx/2006/xaml"
             xmlns:d="http://schemas.microsoft.com/expression/blend/2008"
             xmlns:mc="http://schemas.openxmlformats.org/markup-compatibility/2006"

			 xmlns:ctrl="clr-namespace:Monsalma_AvaloniaUserControlBinding.Controls"

             x:Class="Monsalma_AvaloniaUserControlBinding.Controls.BindableUserControl"
			 x:DataType="ctrl:BindableUserControl"
			 Name="BindableUserControl1">
XAML – Bind to user control by name
To bind to our custom user control from the control itself, we can use the ElementName (WPF/UWP style) or the name prefix character (#).
WPF/UWP style – ElementName
We use ElementName to set data context of the Text binding to our user control. We use Greeting (short for Path=Greeting) to access the direct property:
<TextBlock
	Text="{Binding Greeting, ElementName=BindableUserControl1}" />
Avalonia UI style – Name prefix (#)
We use name prefix (to access our user control) followed by the name of the direct property:
<TextBlock
	Text="{Binding #BindableUserControl1.Greeting}" />
XAML – Bind to user control using ancestor type syntax
There are a few ways to bind to an ancestor:
- We can use
$parentkeyword to reference the parent control (in logical, not visual tree). $parentactually presents a collection of controls, and we can use it to access upper levels of the hierarchy.$parent[0]is equivalent to$parent(1 level up).$parent[1]targets a control 2 levels up,$parent[2]3 levels up and so on.- In our demo, we reference the ancestor using the ancestor type syntax –
$parent[ctrl:BindableUserControl]. - We can also combine level index and ancestor type. For example, we can use
$parent[ctrl:BindableUserControl;1].
<TextBlock
	Text="{Binding $parent[ctrl:BindableUserControl].Greeting}" />
XAML – Bind to user control by setting data context
Our last option is to define DataContext for the TextBlock control. Doing so overrides the hierarchical data context, which is MainViewModel in our case, and allows us to use the simplest form of data binding ({Binding Greeting}). Note that we are referencing the user control by name (Avalonia UI syntax – # prefix).
<TextBlock
	DataContext="{Binding #BindableUserControl1}"
	Text="{Binding Greeting}" />
User control binding in action
For this demo, I chose Windows Desktop and Android as targets. Let’s see the user control data binding in action.
Windows Desktop

Android Emulator – Google Pixel 3 XL (API 30)

Summary
Avalonia UI is great. Its data binding mechanism is great. Its way of defining user controls is great. I hope this article helped explain the way data bindings and user controls can be used together.

Leave a Reply